Cutting out bulkheads
Once the gunwales are in place, my sailing Quick Beth hybrid really begins to depart from the Quick Canoe design. One consequence is that there are no instructions to follow. For instance, the canoes need internal structure to stiffen their hulls against the twisting force generated by sailing any direction except downwind. In an act of guesswork, I decided that four bulkheads made from 4mm ply will be about right - one at each end of the centerboard, and one next to each mast (The canoes are to be yawl rigs, with one sail on a main mast forward and a smaller sail on a mizzen mast aft).
Design
I wanted, if possible, to fit the masts into the hull for storage and transport. We’ve already pieced the sails together so the main mast needed to be at least 2800mm tall. So the minimum separation between the foremost and aftmost bulkheads is a bit greater than 2800mm, assuming there will be ports or hatches in the midships bulkheads.
Guesstimating that each sail’s center of effort is at its centroid, I managed to lay out the main, mizzen, daggerboard, and rudder so that the overall center of effort aligned with the center of lateral resistance (ignoring the hull’s resistance, which is maybe too crude an estimate?) The calculations were scribbled in a notebook, so I’ll put them up if I find them again.
Measurements
There are no straight lines on these boats, so finding a good baseline for measuring is tricky. In the end, I made my measurements from the butt joint that defines the boat’s (lateral) centerline.
In order to make the bulkheads vertical, I made measurements separately at top and bottom: along the bottom panel (based on the center seam of the bottom panel) to locate the bottom of each bulkhead, and perpendicular to a piece of wood laid across the gunwales at the panel seam in order to define the upper corners of each bulkhead.
Templates
Once the corners of each bulkhead were defined, I cut up some scrap bits of the material I’d used as a fairing batten when defining hull panels, I made a template for the shape of each bulkhead:
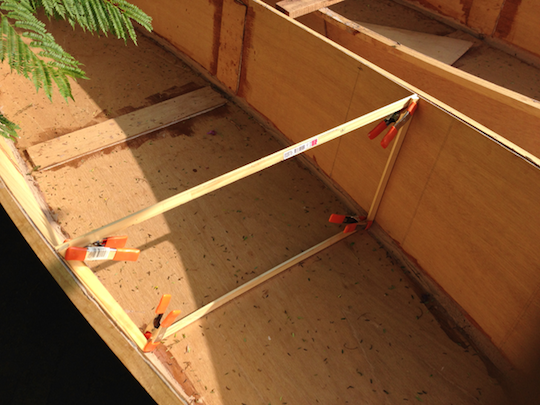
Then I traced the templates on plywood and cut out the shape. The photo shows how the hull’s gentle curves create big gaps around the template - I should have cut well outside the traced lines and then planed away the excess to match the hull’s exact cross-section but I only thought of this once most of the bulkheads had been cut out. Oh, well - thickened epoxy can fill the gaps.
Peeking ahead
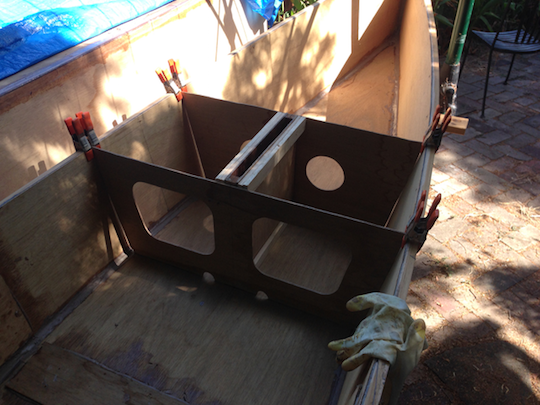
Here’s a photo that shows bulkheads 2 & 3 (amidships), with the light well-positioned to show the gaps around each bulkhead that will need to be filled by thickened epoxy. It looks ugly now, but once it’s bedded in an epoxy fillet who will know the difference?
Ports and hatches
One more detail you can see in the photo above is that I’ve cut out large ports in bulkhead three, and holes for 4” deck hatches in bulkhead two. The dimensions of the centerboard case were pulled straight from the OZRacer Mk 2, while the maximal size of the cutouts in bulkhead three were derived from the size of the cutouts in bulkhead three of the Goat Island Skiff.
There are no cutouts in bulkhead one (forward near the mainsail), while bulkhead four has a cutout for a single 4” hatch.